Ubuntu 24.04 guest setup for MI350P passthrough#
Setting up Ubuntu 24.04 as a virtual machine in ESXi with GPU passthrough requires specific configuration steps to ensure proper performance and device recognition. This section covers VM creation, system requirements, guest operating system preparation, MMIO passthrough parameters, and GPU assignment.
Complete the steps in ESXi host setup before you start this section.
Download the Ubuntu installer ISO#
Download the Ubuntu 24.04 installer image to an ESXi datastore so it is visible from the web UI when the VM creation process starts.
On the ESXi host, navigate to the /vmfs/volumes directory, list available datastores, and download the installer ISO to one of the datastoreX directories.
cd datastore1
wget https://releases.ubuntu.com/24.04.2/ubuntu-24.04.2-desktop-amd64.iso \
   --no-check-certificate -S
# Make sure to update the installer if offered.
#
# Or the server version:
# wget https://releases.ubuntu.com/24.04.2/ubuntu-24.04.2-live-server-amd64.iso \
#   --no-check-certificate -S
If the wget command gets stuck, allow the HTTP client through the ESXi firewall and try again:
esxcli network firewall ruleset set -e true -r httpClient

List /vmfs/volumes on the ESXi host. One or more datastoreX directories (alongside UUID-named volume paths) should be present. Download the Ubuntu installer ISO to a datastore that will be accessible during VM creation.#
Create the virtual machine#
Once the download completes, return to the web UI and navigate to Virtual Machines → New Virtual Machine to start the creation wizard.
Set the VM name and compatibility#
On the Select a name and compatibility step, enter a name for the virtual machine, set Compatible with to ESXi 9.0 and later (virtual machine hardware version 22), and click Next.
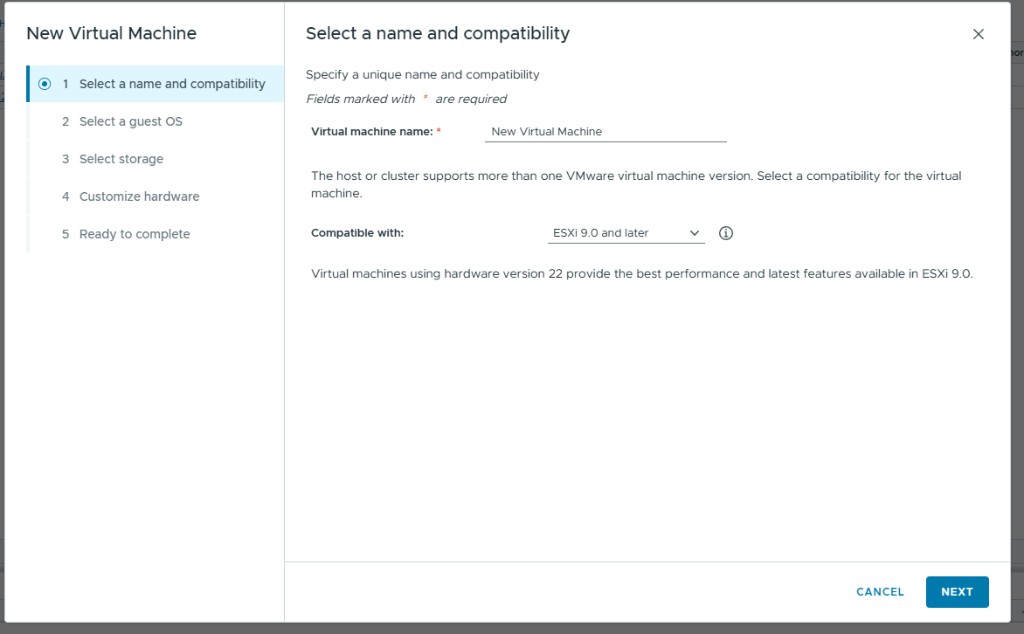
Select a name and compatibility for the virtual machine. Set Compatible with to ESXi 9.0 and later (hardware version 22) for current performance and feature support on ESXi 9.x hosts.#
Select the guest operating system#
On the Select a guest OS step, set Guest OS Family to Linux, set Guest OS Version to Ubuntu Linux (64-bit), and click Next.
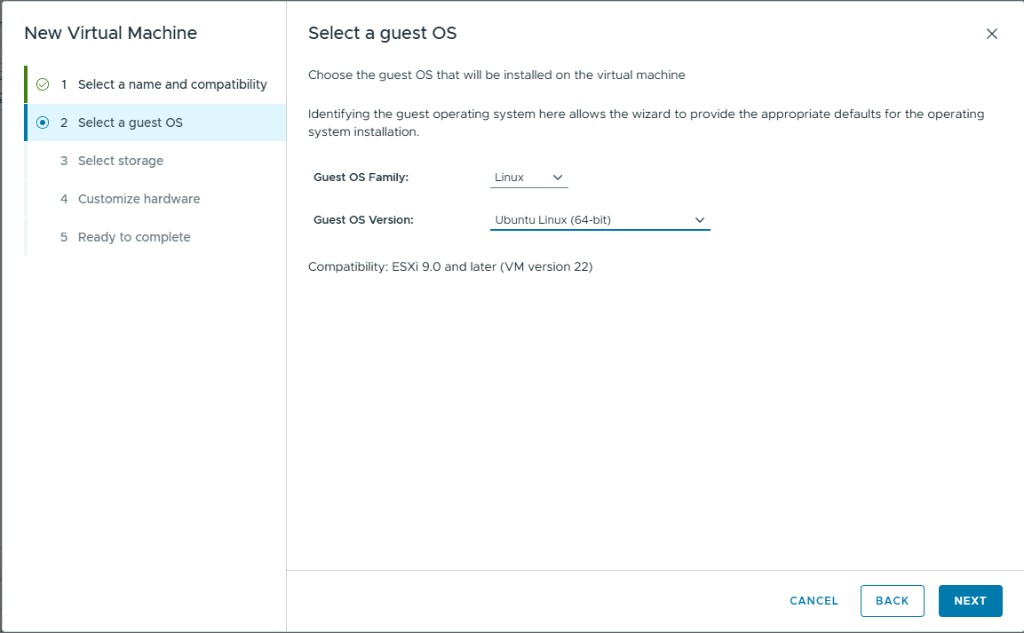
Select the guest OS family and version. Set Guest OS Family to Linux and Guest OS Version to Ubuntu Linux (64-bit).#
Select storage#
On the Select storage step, choose the datastore where the VM will be stored (for example, datastore1), and click Next.
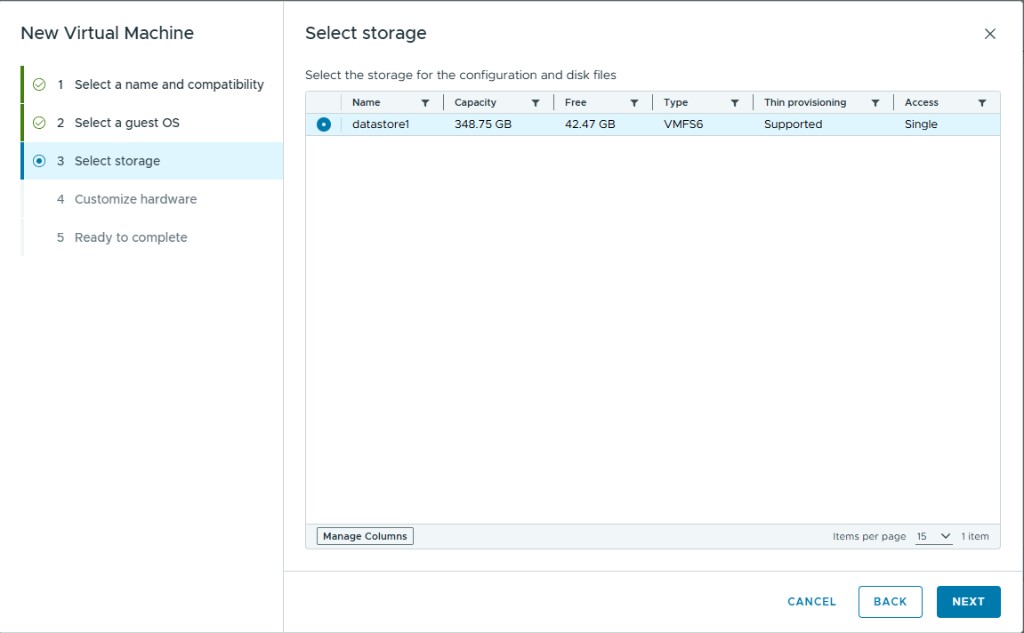
Select the target datastore. Choose the datastore that has sufficient free space for the VM configuration files, virtual disk, and any ISO images you plan to attach.#
Customize hardware#
On the Customize hardware step, configure CPU, memory, disk, and devices according to your workload requirements.
For CD/DVD Drive 1, select the drop-down, open the search dialog, select the .iso file you downloaded previously, close the dialog, and check the Connect checkbox on the CD/DVD Drive 1 row.
Under the Memory tab, expand the settings and tick Reserve all guest memory. You need this setting once passthrough is enabled.
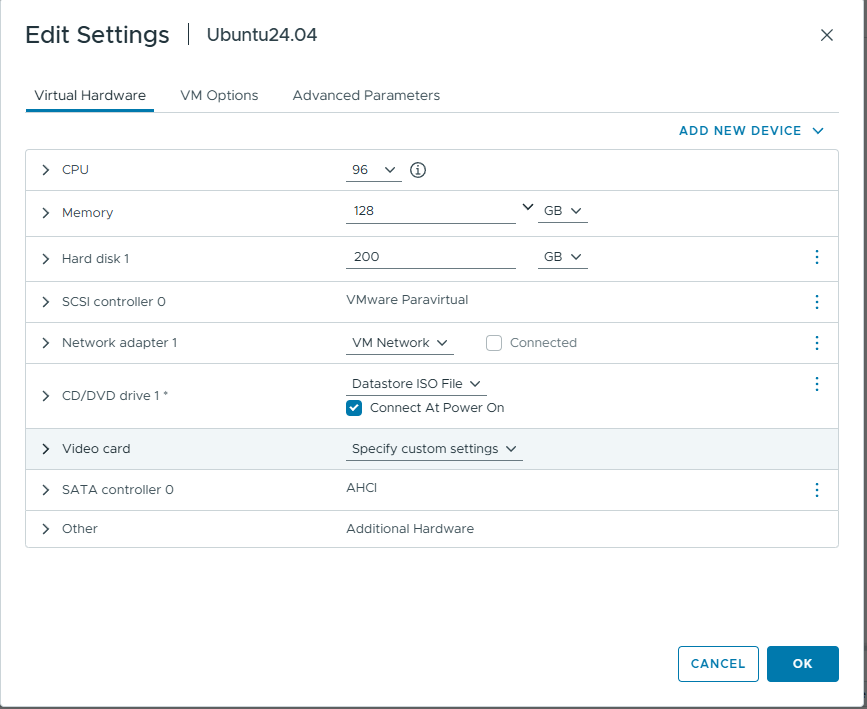
Example VM hardware sizing and devices. Configure CPU, memory, and disk according to your workload. Enable Connect At Power On for the CD/DVD drive and select Reserve all guest memory under the Memory settings.#
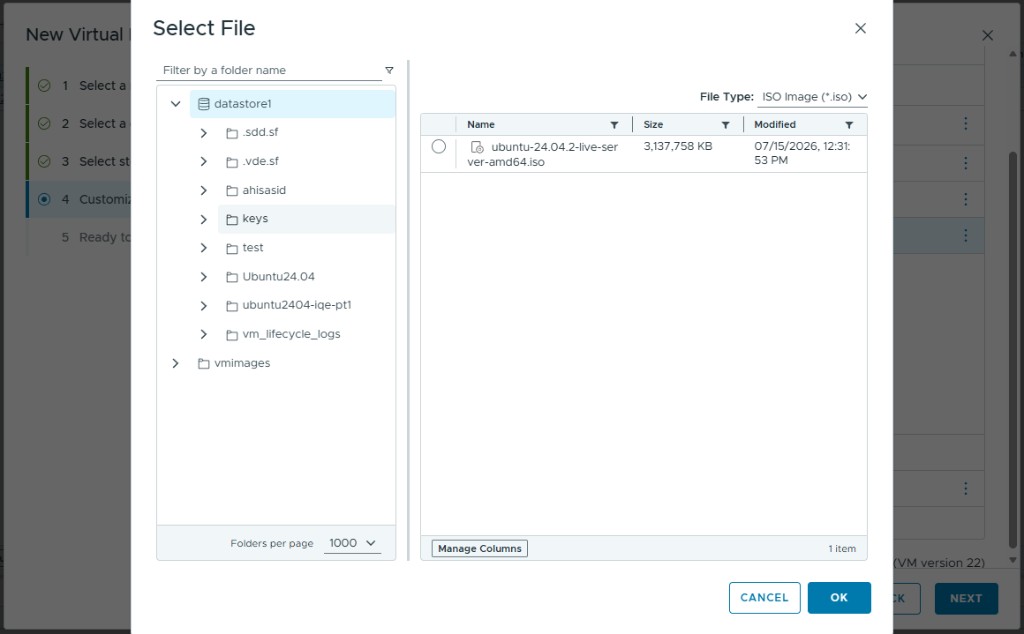
Select the Ubuntu installer ISO for the CD/DVD drive. Browse the datastore, choose the downloaded ubuntu-24.04.2-*.iso file, and enable Connect on the CD/DVD Drive 1 row.#
Install Ubuntu in the guest#
Save the VM template and start the VM. Upon first boot, a console window loads the selected .iso installer. Depending on the image type, either graphical or command-line installation of Ubuntu begins. The installation process is the same as a standard Ubuntu install and is not covered in detail here.
After installation completes, verify the installation is working as expected. Then enable the SSH service and record the VM IP address.
sudo apt install openssh-server
sudo systemctl start ssh
sudo systemctl enable ssh
ip addr   # save the output of this command
If you used the Ubuntu server variant, a checkbox during installation can enable SSH automatically.
Pre-configure the guest before GPU assignment#
Before you assign MI350P GPUs to the VM, apply the following guest configuration steps.
Blacklist conflicting drivers#
Blacklist the amdgpu driver so the default installation does not hang on the first boot once GPUs are assigned. Also blacklist vmwgfx so other amdgpu-based tools and libraries can appropriately initialize and use the amdgpu driver.
Edit /etc/modprobe.d/blacklist.conf and add the following lines at the end of the file:
blacklist amdgpu
blacklist vmwgfx
Then update the initramfs:
sudo update-initramfs -u
Disable the GUI (desktop image only)#
If you used the desktop image variant for Ubuntu, disable the graphical user interface (GUI). The MI350P does not support a graphical desktop in this passthrough configuration, and disabling the GUI removes error messages when loading the amdgpu driver later.
Warning
After you run these commands, the GUI will no longer be usable in the ESXi web UI console view for the VM.
sudo systemctl stop gdm
sudo systemctl set-default multi-user.target
Configure MMIO passthrough parameters#
Power off the VM for GPU assignment and configuration. Open the VM edit window and navigate to VM Options → Advanced → Edit Configuration.
Add configuration properties (key-value pairs) using the Add parameter button. On ESXi 9.1, the following two parameters are required:
Parameter |
Value |
|---|---|
|
|
|
See sizing formula below |
Size the MMIO aperture#
The value of pciPassthru.64bitMMIOSizeGB depends on the application-specific integrated circuit (ASIC) and on how many GPUs are assigned to the VM. Compute it from the GPU’s VRAM BAR size (its 64-bit prefetchable memory aperture, also called the framebuffer BAR), in GB, not the high-bandwidth memory (HBM) capacity, multiplied by the number of assigned GPUs:
pciPassthru.64bitMMIOSizeGB = B × N
where B is the per-GPU VRAM BAR size in GB and N is the number of assigned GPUs.
For the MI350P and MI350X, B = 512 GB. The following table shows example values:
GPUs assigned (N) |
Calculation |
|
|---|---|---|
8 |
512 × 8 |
|
4 |
512 × 4 |
|
1 |
512 × 1 |
|
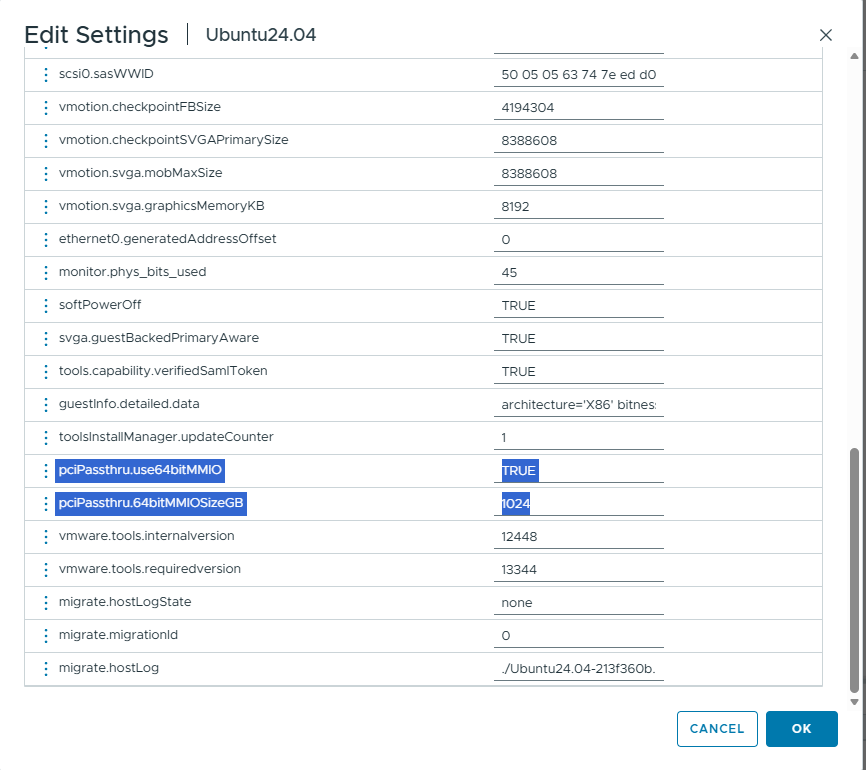
Advanced VM configuration parameters for GPU passthrough. Add pciPassthru.use64bitMMIO = TRUE and set pciPassthru.64bitMMIOSizeGB to B × N (for example, 4096 for eight MI350P GPUs). The example screenshot shows a single-GPU configuration with 64bitMMIOSizeGB = 1024.#
Tip
Scale the MMIO aperture value proportionally when you assign fewer than eight GPUs to the VM.
Assign MI350P GPUs to the virtual machine#
With the VM powered off and MMIO parameters configured, open the VM edit window and complete the following steps:
On the Virtual Hardware tab, click Add new device and select PCI Device.
In the Device Selection dialog, select the MI350P entry with Access Type: Fixed DirectPath IO and click Select.
Confirm the added GPU appears in the Virtual Hardware list as a PCI device with Access Type: Fixed DirectPath IO.
Repeat the previous two steps for each additional GPU you want to assign to the VM.
Save the configuration.
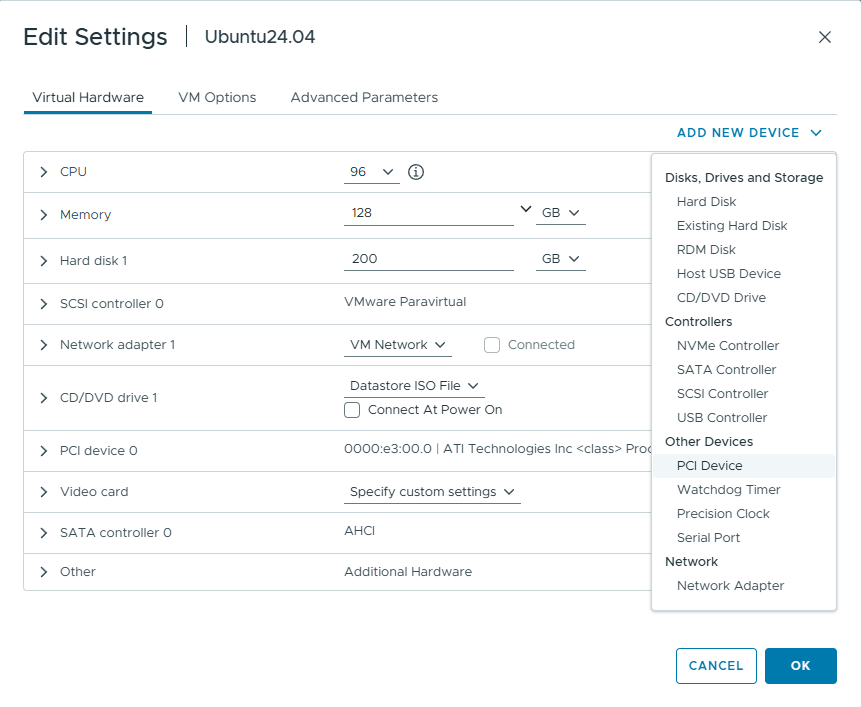
Add a PCI Device from the Add new device menu. On the Virtual Hardware tab, open ADD NEW DEVICE → Other Devices → PCI Device.#
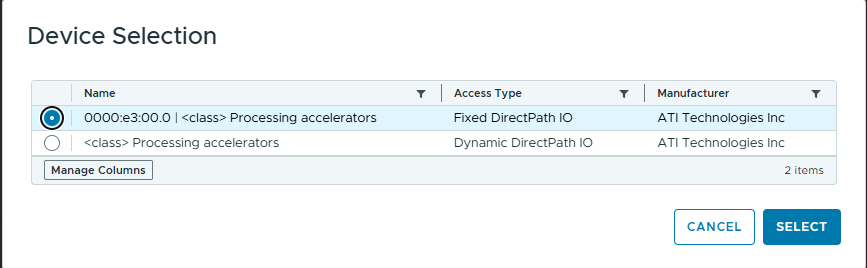
Select the GPU (Fixed DirectPath IO) in the Device Selection dialog. Choose the device entry with Access Type: Fixed DirectPath IO (not Dynamic DirectPath IO) and click Select.#
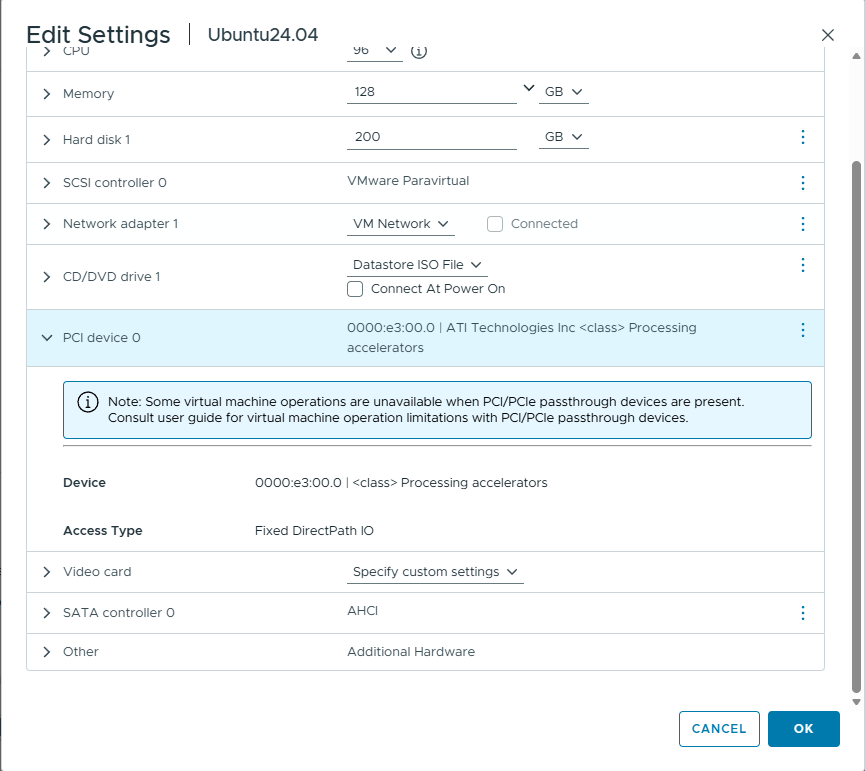
MI350P PCI device assigned to the VM (Fixed DirectPath IO). The Virtual Hardware list shows the device bus, device, and function (BDF), manufacturer, and Access Type: Fixed DirectPath IO. Repeat for each additional GPU.#
Verify GPU detection in the guest#
Start the VM again. Once the VM has booted successfully, SSH into it and verify that the GPU or GPUs are detected correctly:
lspci | grep -i amd
XX:XX.X Processing accelerators: Advanced Micro Devices, Inc. [AMD/ATI] ...

Verify GPU detection inside the guest. Running lspci -d 1002: (or lspci | grep -i amd) should list the MI350P GPU at the assigned PCI address. The ESXi UI may label the device class as Processing accelerators.#
If the MI350P device or devices appear in lspci output, the passthrough configuration is successful. Proceed to Install ROCm and the AMD GPU driver to install the AMDGPU driver and ROCm components in the guest.